


What is Nginx?
Nginx is a popular tool used in configuring and hosting websites, it has other important features too such as load balancing, etc. Although this is not the only tool used for this particular function, there is also apache which is also very popular as well. To know more about Nginx and its functions/properties click here.
What is Ansible?
Ansible has become very popular because of its value proposition which it brings to the industry of Cloud computing, Networking, DevOps, and others, in terms of configuration management. the list of things you can do with ansible ranges from simple command-line tasks to complex configurations that can be deployed to a host of servers, Kubernetes pods, Docker containers, etc using various Modules. More comprehensive documentation about Ansible for better understanding can be found here.
Objective
Now we have an Idea of what Ansible and Nginx are, let's gets started. For this exercise we will be installing Nginx on an EC2 instance(target machine) from another EC2 instance(control node) which is our ansible host.
What we need to get this done.
- An AWS account
A linux terminal (preferably git bash if you are on windows)
Note
I will be using the default VPC, if you have a custom VPC you will have to adjust your settings accordingly.
- My code for this exercise can be found on Github
- You can connect with me on LinkedIn
Setting up the Environment
Create security groups
Create a security group called AnsibleSG with the following inbound rules:
- Type: SSH
- Port range: 22
- Source: My IP
This will enable you to ssh into the Ansible host. Create another Security Group "ServerSG" with the following inbound rules:
- Type: HTTP
- Port range: 80
- Source: My IP
- Type: SSH
- Port range: 22
- Source: My IP
- Type: SSH
- Port range: 22
- Source: Control node IP
Create EC2 instaces
Create an EC2 instance(control node where Ansible will be installed) with the following properties
- AMI: Ubuntu Server 20.04 LTS (HVM), SSD Volume Type
- Instance Type: t2.micro
- VPC: Default
- Tags: Key = name, Value = Ansible control node
- Security Group: AnsibleSG
- Keypair: Create new or existing
Next, we will create another instance that will serve as the target node/server to install Nginx. The instance will have the following properties:
- AMI: Ubuntu Server 20.04 LTS (HVM), SSD Volume Type
- Instance Type: t2.micro
- VPC: Default
- Tags: Key = name, Value = Nginx
- Security Group: AnsibleSG
- Keypair: Use same key above
When you are done with the above steps you will be having an environment as shown in the screenshot below.

Install Ansible and Setup SSH
Ansible is going to dwell or exist inside our control node(EC2) instance that we have provisioned above. In other to install ansible, we will need to SSH into the control node and carry out the installation procedure. Note! am running the ssh command from a Linux terminal, if you are using windows you can download putty or use gitbash. instructions for installation of putty can be found here. To SSH into the control node, make sure you are in the same directory where you have the private key you have from AWS, then run the following command:
ssh -i "<your key name.pem>" ubuntu@<control node instance IP>
When inside the control node, you can install Ansible by running the following commands:
  sudo apt-get update
  sudo apt-get install software-properties-common
  sudo apt-add-repository --yes --update ppa:ansible/ansible
  sudo apt-get install ansible
After Ansible has been successfully installed, you need to setup ssh connection between your control node(Ansible host) and your target Instance. This will enable Ansible to comunicate freely with the target instance. To do this you need to generate a key pair that will be used to authenticate the control node whenever a connection is initiated. While still logged in the control node, run the following commands;
ssh-keygen #this will generate the keys
cat ~/.ssh/id_rsa.pub #this will print the contents of the public key for you to copy and paste on a clip #board
Now exit the control node and SSH into the target instance and run the following code
cat >> ~/.ssh/authorized_keys
paste in the contents of the public key you copied ealier pres "ctrl +d" to save and exit. Exit from the target instance and ssh back into your control node to test the connection. Run the following code;
ssh ubuntu@target-instance-IP
There will be a fingerprint prompt, type yes. you will be logged into your target instance. Exit to return back to your control node. Now that SSH connection has been set up lets move on.
Creating the Ansible playbook
An Ansible playbook is a file that contains the task or procedures that you want to execute on your target machine(s) properly documented in YAML syntax. When creating a playbook there are different ways that it can be structured, you can follow a simple format where you have a YAML manifest file that contains the description of the desired state of your system, or you can follow a structure that enables you to establish different roles that contain a collection of tasks you want to deploy. You can find more information on playbooks here. An inventory file is what contains a list of the addresses of the machines/servers you want to configure and apply changes to.
First, we will access our files by cloning the github repo:
git clone https://github.com/Joshua-Igoni/ansible-dev.git
Now that we have our files lets examine the structure to understand how Ansible will go about the installation and configuration of nginx. To examine the structure use the command tree if the terminal flags 'command not found' you will have to install it using the command ;
sudo apt-get install tree
Type in the command tree and you should be able to see something that looks like what i have below
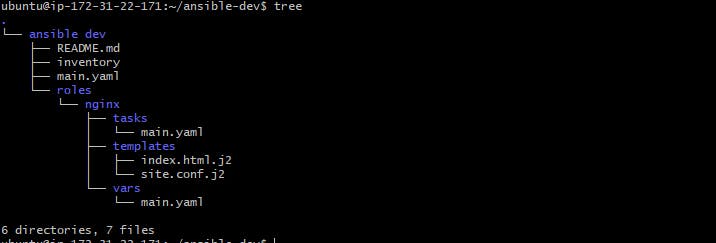
From the picture above, there is a top-level directory ansible dev that contains inventory and main.yaml files, the inventory file contains the list of target IPs that we intend to configure, in this case is just a single IP which will be your target instance IP.
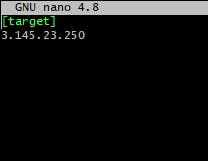
inventory file
contents of main.yaml shown below
# Install Nginx
---
- hosts: target
  become: True
  become_user: root
  roles:
    - nginx
The main.yaml file contains the information that would be used by Ansible to connect to the target machines in the inventory file, and also tell Ansible to connect to the machine as the root user so as to have administrative privileges to perform installation procedures. The file tells ansible to look for a directory(folder) called "Nginx" that exists inside a "roles" directory to find what it needs to execute the installation. Roles are there to separate different collections of tasks that have been group together to achieve a particular desired state. In this case, the "desired state" of the system that we are after is the installation of Nginx. The "Nginx" role that contains tasks which is a folder that holds a main.yaml file that is a list of procedures that will be executed sequentially to achieve the state, vars which is also a folder that contains a main.yaml file that lists all the variables that will be needed for successful completion, templates which is also a folder that holds configuration files for the server to be installed successfully.
Let's take a closer look at each of these files, starting with the task folder which contains a "main.yaml" file, the contents are shown below. Each task has a name that serves as a form of documentation so that if someone else uses this playbook it would be easy to understand and follow up on the processes. Each task also has a module from which it draws references for execution, for this process of installation we used the apt, template and systemd modules. For more comprehensive overview of modules click here
    # Install Nginx

- name: "apt-get update"
  apt:
    update_cache: yes
    cache_valid_time: 3600
- name: Install Nginx
  apt:
    name: nginx
    state: latest
- name: generate Nginx site config
  template:
     src: site.conf.j2
     dest: /etc/nginx/sites-available/site.conf
     owner: root
     group: root
     mode: 0755
- name: Generate index.html
  template:
     src: index.html.j2
     dest: /var/www/html/index.html
     owner: root
     group: root
     mode: 0744
- name: Enable Nginx service
  systemd:
    name: nginx
    daemon_reload: yes
    enabled: yes
    state: started
The next is the Templates directory which holds the configuration of the site and the index file. The contents of the site.conf.j2 and index.html.j2 are shown below respectively. The files contain certain variables which will be defined in a separate file in a separate folder.
contents of site.conf.j2 shown below
server {
        listen   80;
        server_name  {{ SERVER_NAME }};
        root   {{ FILE_PATH }};
        location / {
                index  index.php index.html index.htm;
                autoindex off;    #enable listing of directory index
        }
}
contents of index.html.j2 shown below
<!doctype html>
<html>
<head>
<title>Welcome {{ STUDENT_NAME }} to Ansible</title>
</head>
<body>
<h2> {{ STUDENT_NAME }} </h2>
<p><strong>Configure your world your way ™</strong></p>
</body>
</html>
The final folder is vars folder which holds the main.yaml file that has all our variables defined. The contents are shown below
SERVER_NAME: "<server ip>"
FILE_PATH: "/var/www/html"
STUDENT_NAME: "<Student name>"
Now we have everything setup lets go back to the top level folder and run our playbook, run the playbook with the following command:
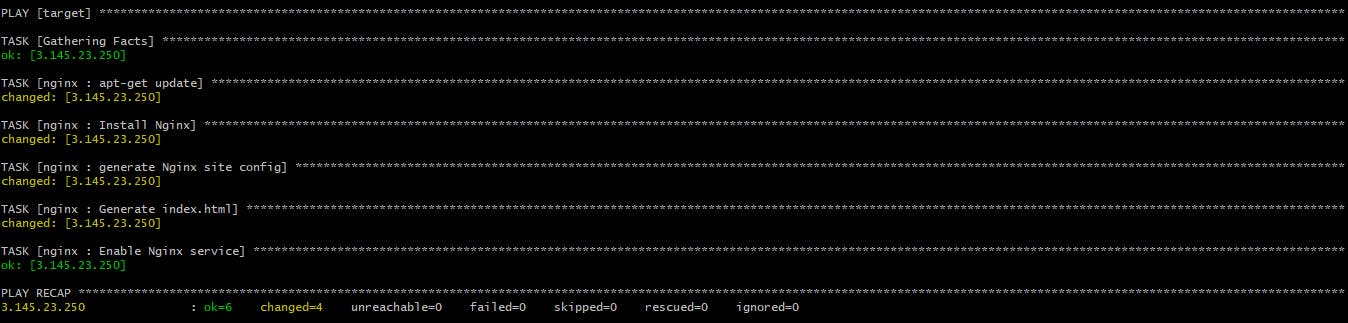
ansible-playbook -i inventory main.yaml
If everything is setup correctly, you wont be having any errors, the output should look like the following
when you access the IP:80 of your machine, you should be having a customized static web page as shown below

Awesome right? Now I would encourage to take a deep dive into Ansible documention because its a really great place to learn about the tool and how it applies to your particular domain of tech. Thank you for reading. Feel free to like and share.